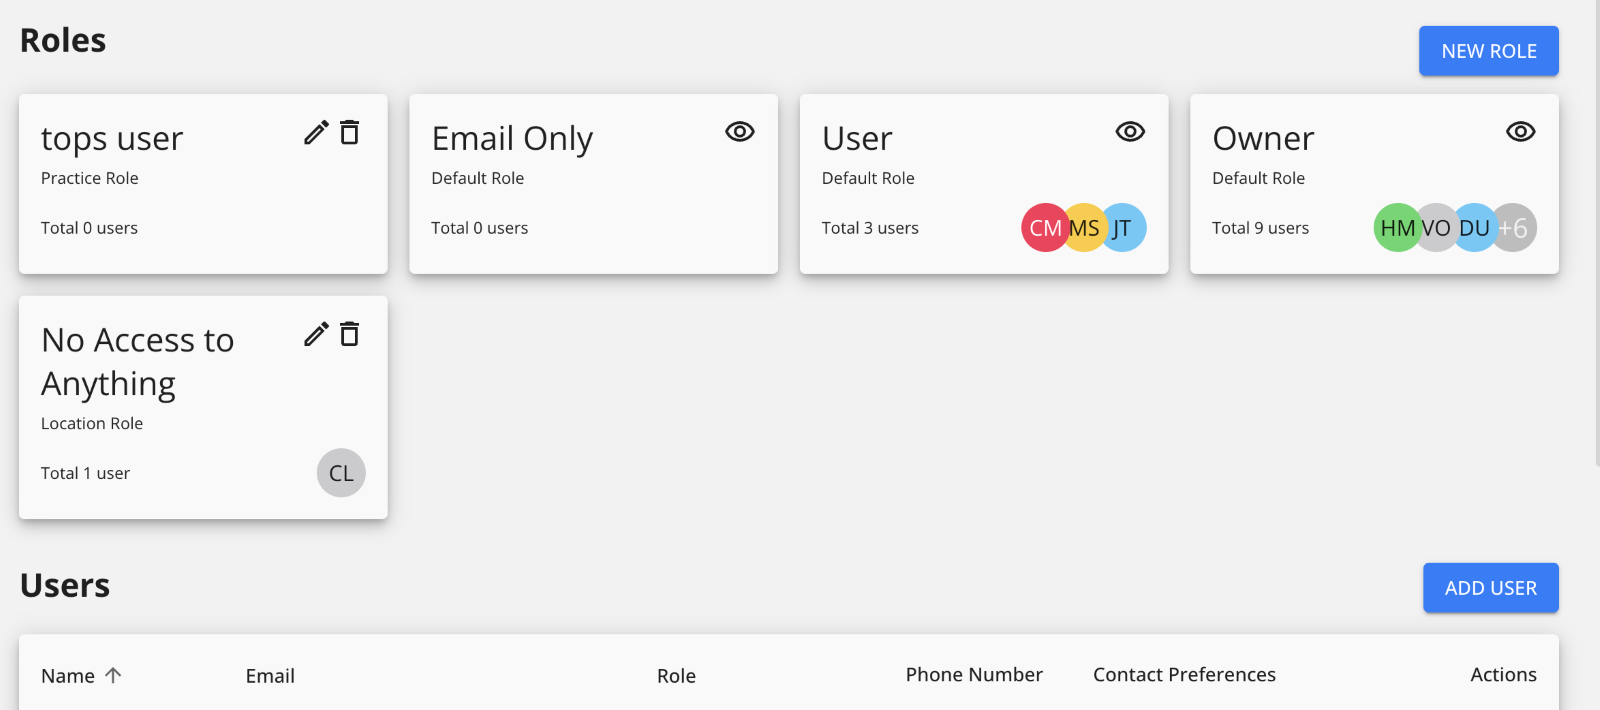
Manage Users
Add a new user
- To add a new user, navigate to the menu on the left hand side of the screen and select “Manage Users”

- Select “Add User”
- Enter new user information and select their role
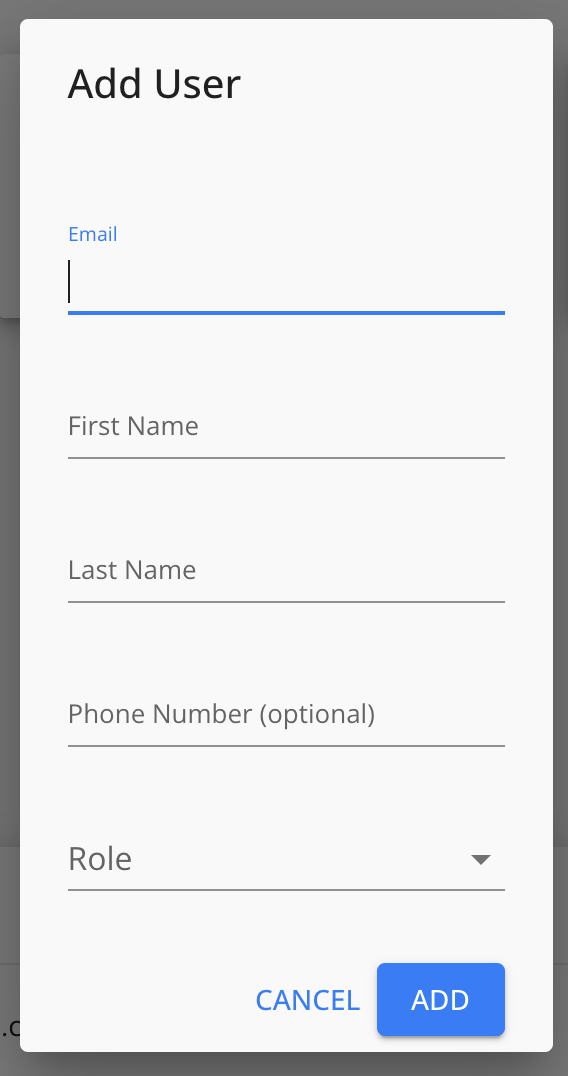
- Save the user by pressing “ADD”
- New users will be sent an email to claim their account and set up a password.
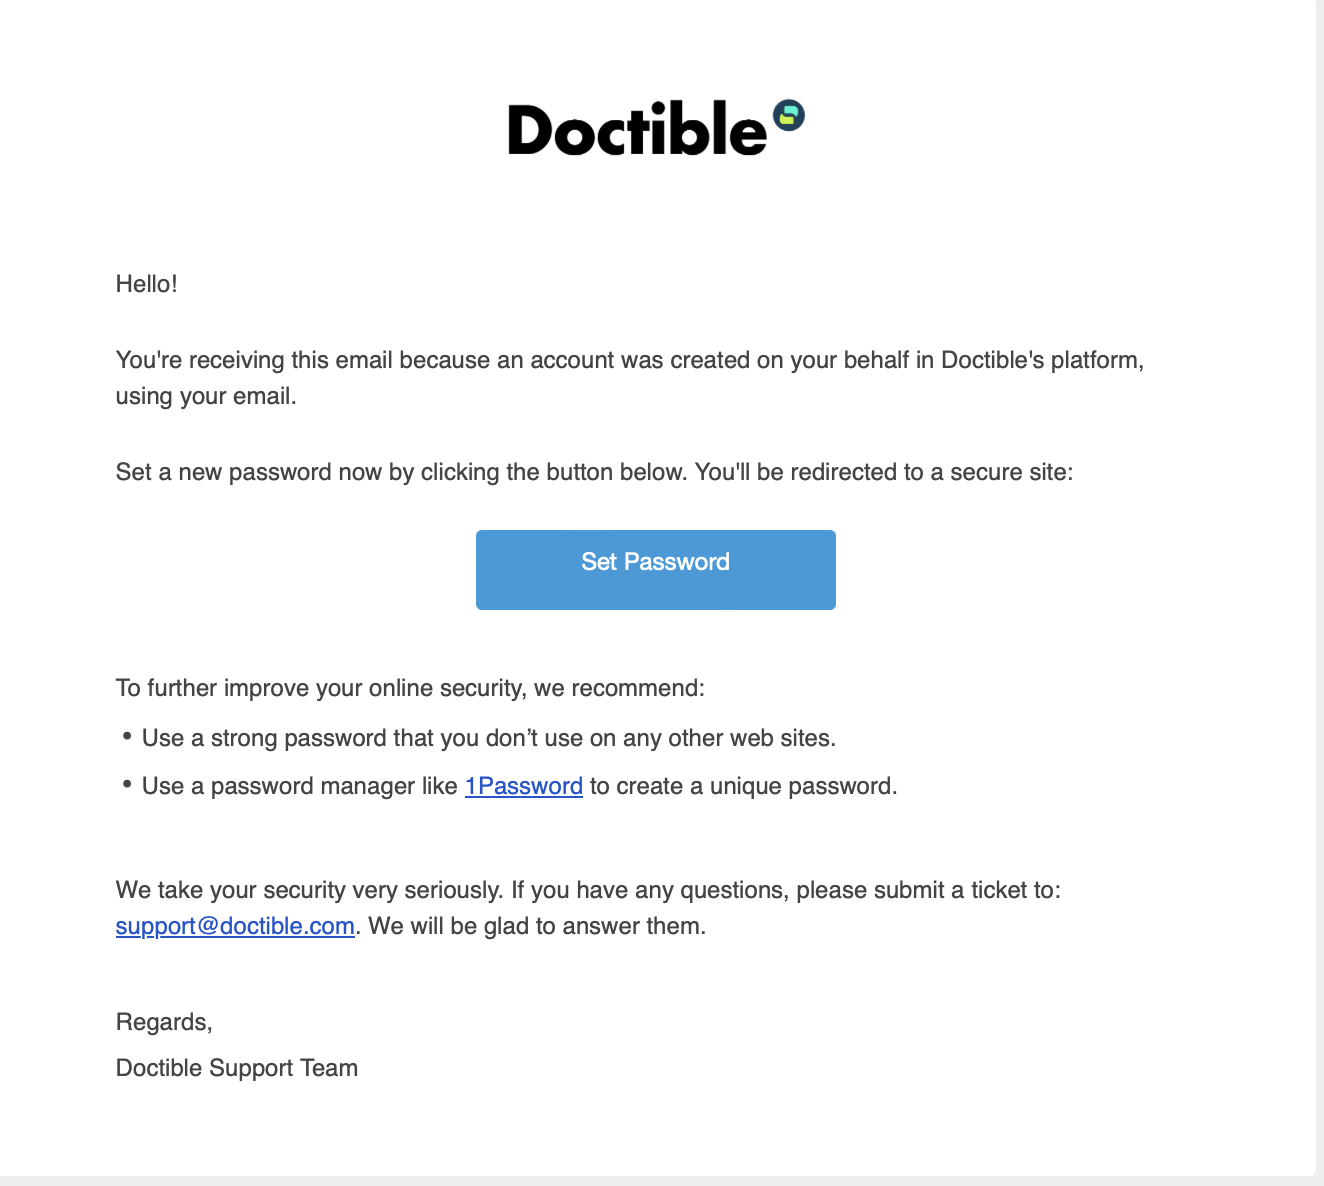
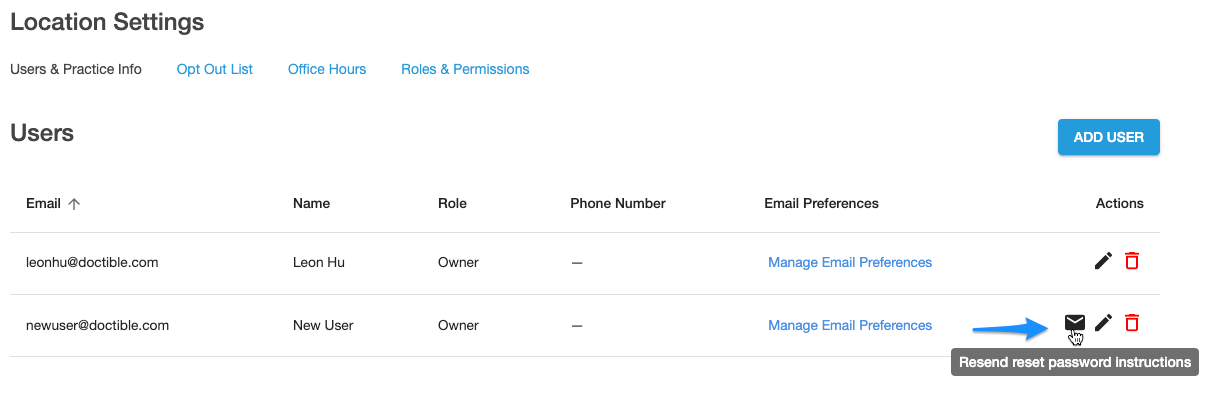
Note: If the user does not receive a confirmation email, select the email icon on the new user row to resend the set password email
Delete an existing user
- To remove users, select the delete icon on the user row
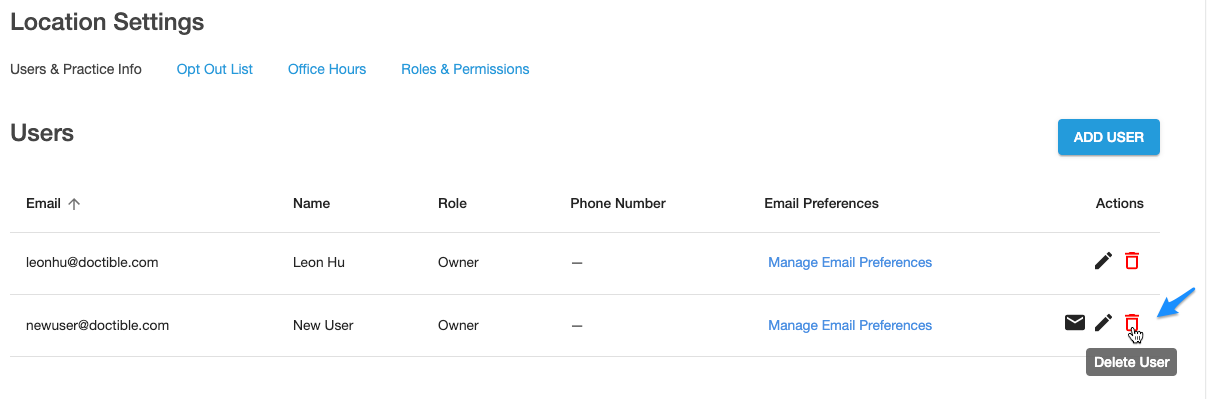
- This action cannot be undone, so be sure that this is a user you want to remove

Manage Roles & Permissions
- Navigate to “Manage User” on the left side menu

- Select "New Role"
- Assign a name and select permissions for the role
Note: For multi-location practices, you must decide if you want this role to be available at all locations or just the selected location
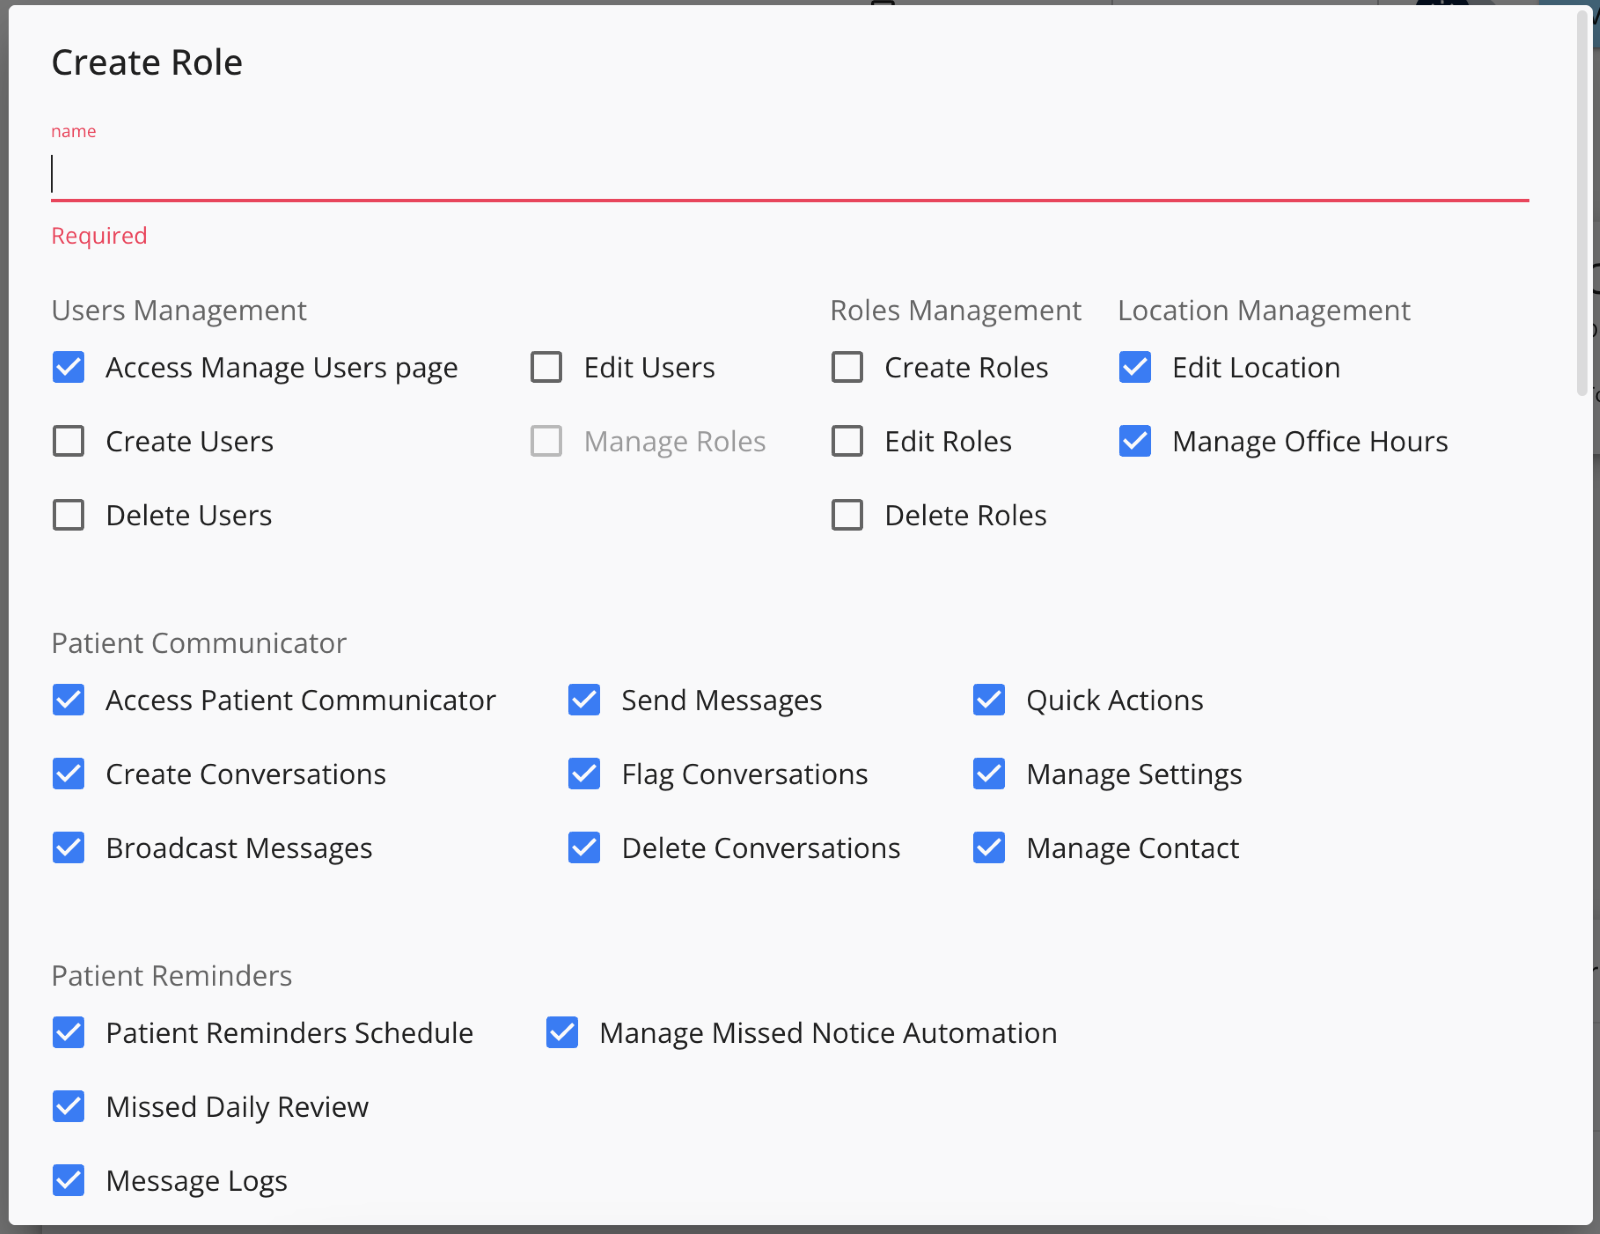
- Save your new role by selecting "Create"

Add or Remove Permissions from Roles
- Select the edit icon on the corner of the role you’d like to edit

- Update permissions by checking or unchecking permissions
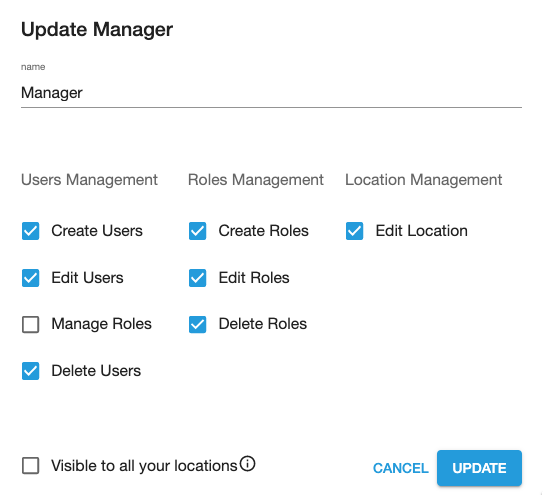
- Save your updates by selecting “Update”
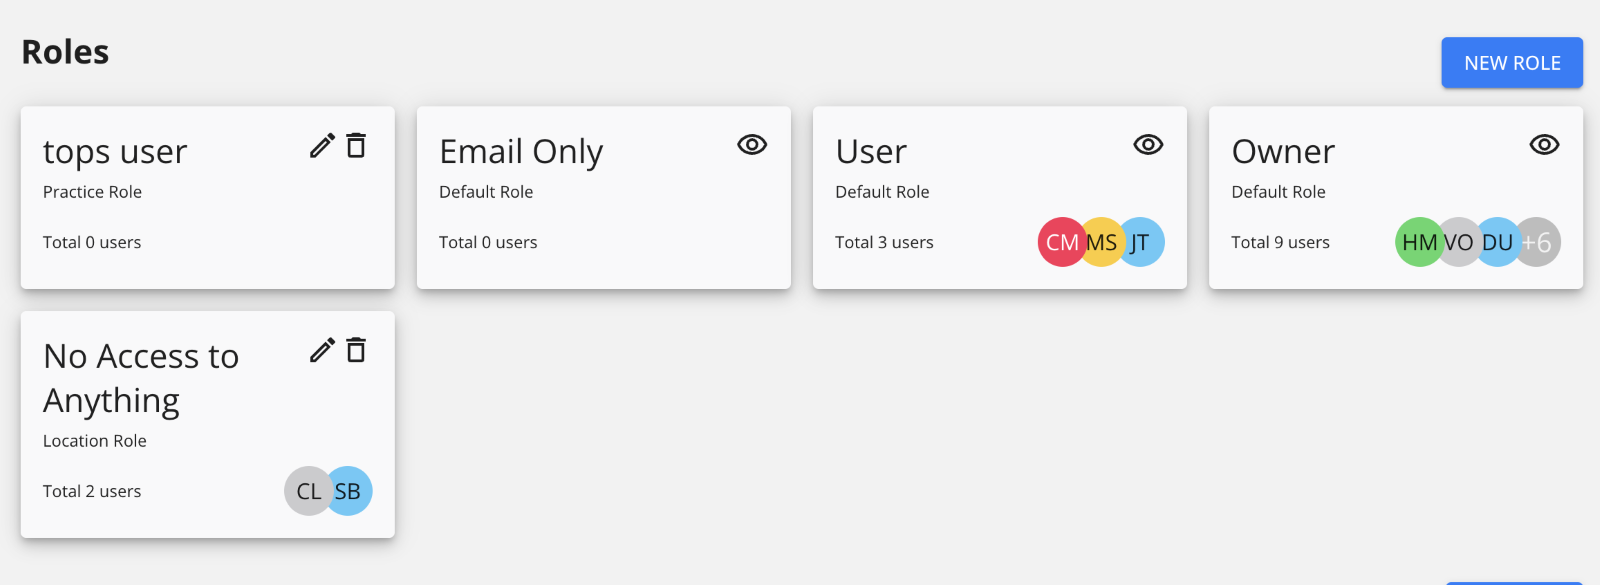
View Permissions for existing roles
- To view permissions for roles that you cannot edit, select the view icon in the right hand corner
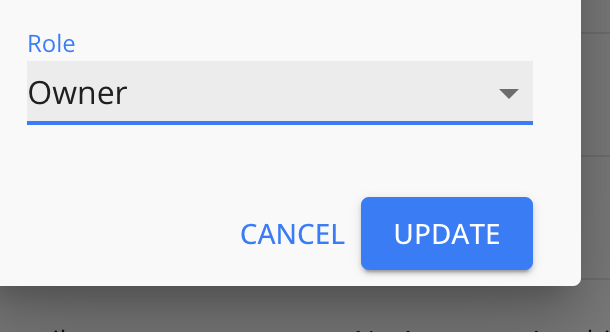
Assign Roles to Users
- On the list of all users, select the “edit” icon.

- Select the dropdown next to “role” and select their new role
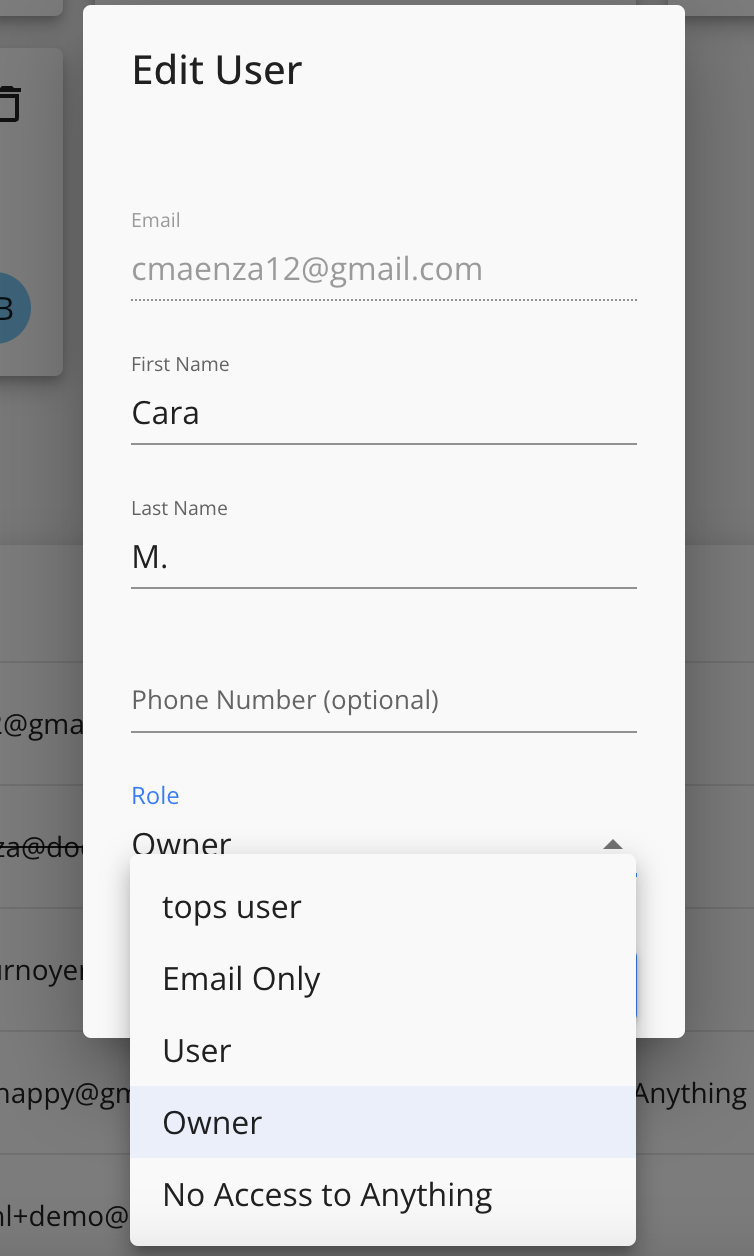
- To save, click “Update”

.png)

